GA Loves The iPad mini
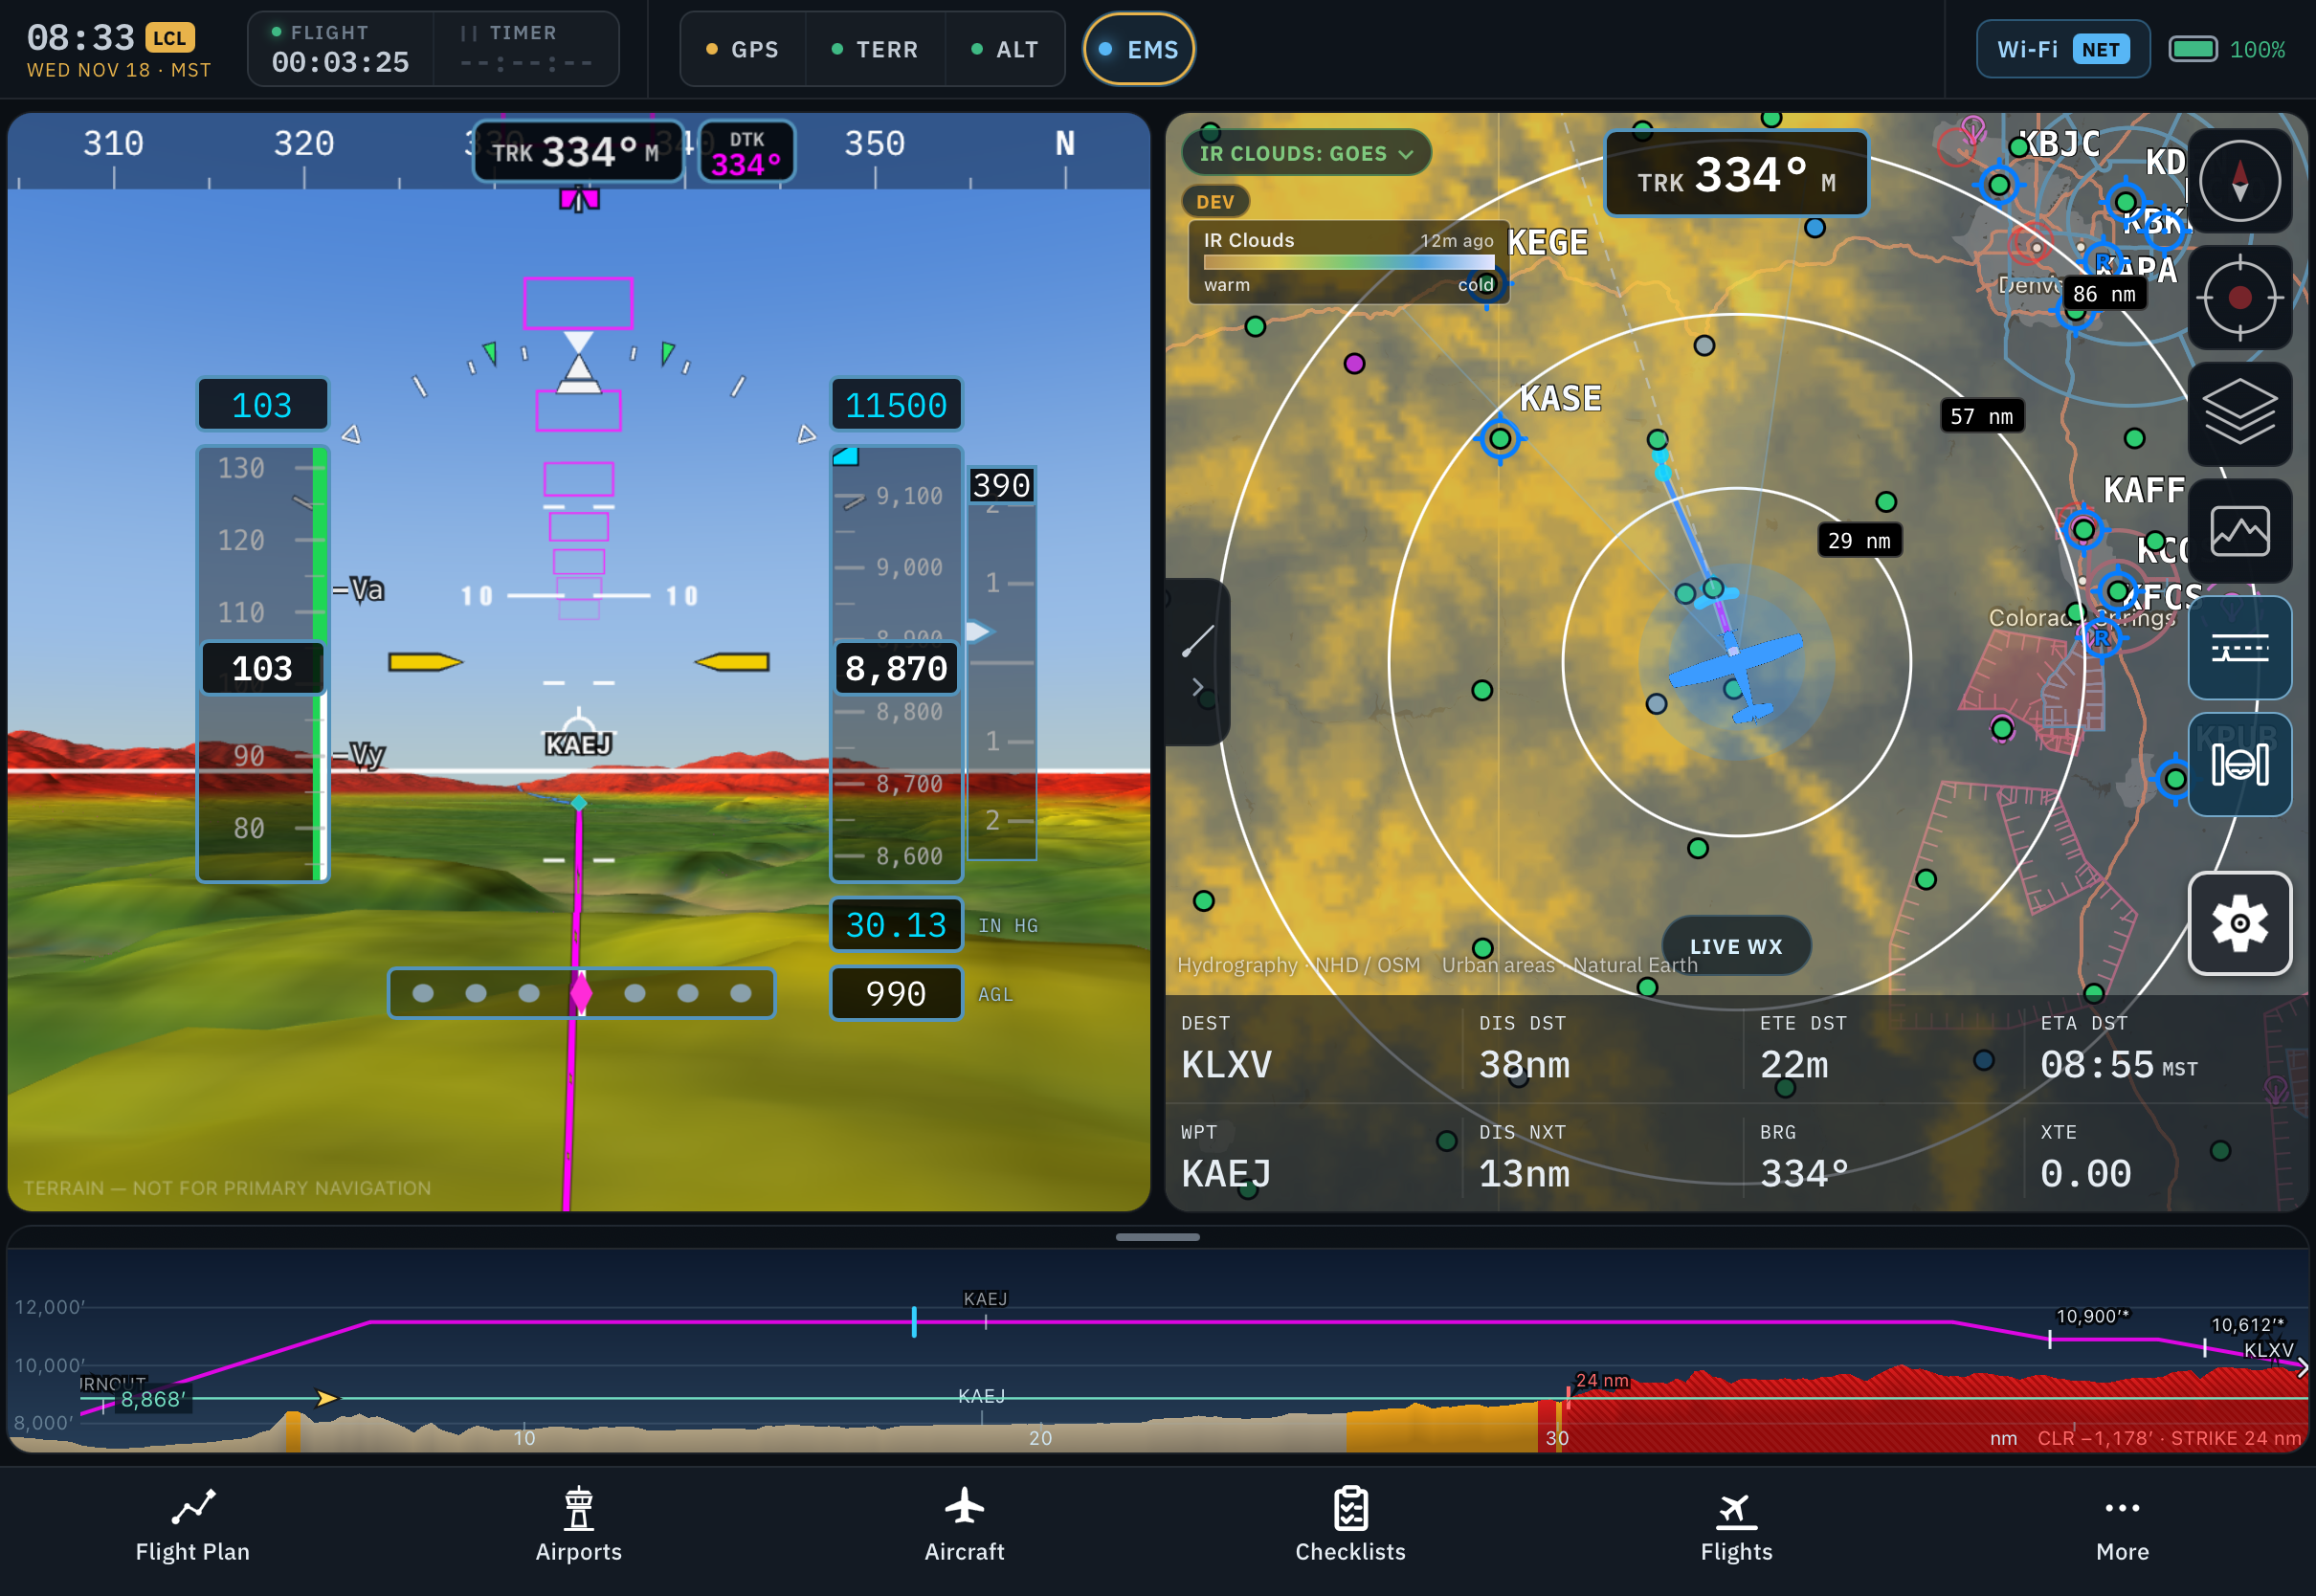
When I started working on Falken EFB I didn’t give too much thought to the iPads that people use for EFBs. I’ve been building and using FlightView for the past decade so I have a lot of iPads, but in FlightView installations are almost always full size (10″ – 11″) models mounted in landscape orientation. It was one of those “doh!” moments when I started to see the data from our beta: most people use minis, and most people use them in portrait.
Ok, that makes sense. The mini is the right size and shape to work well in the cockpit. After a few days I decided to focus our testing on the mini platform since that’s what our customers will be using. I dug out my old mini 6 and loaded it up with Falken EFB.
That worked fine for bench testing, but the first time I flew with it I re-discovered the reason we built the FlightDock when we rolled out FlightView. I love iPads and am about as big of an advocate for their use in aviation as you’ll find, but they do have limits and constraints that you need to address:
- You need to secure them.
- You need to keep them charged.
- You need to keep them cool.
- You need to get the audio they produce into your headset somehow.
- You need to keep the sun off of them.
There are products out there that do each of these things but nothing that all of them. You need a mount, a charger, a cooler, an audio interface, and sometime a sun shade. Nothing on the market is all of those things. There are cases with coolers. There are mounts. There are chargers. There are Bluetooth interfaces. Each requires its own power source. Each has to be installed somewhere. Surely there’s a better way…
Does The World Need Another iPad Mount?
After the first awkward fight with the iPad on my lap and cables strewn around the cabin I started doodling around in CAD with different designs for a portable portrait mini mount that would:
- Fit any recent version of the iPad mini (6 – 8)
- Include a USB-C charger.
- Include active cooling.
- Include a Bluetooth audio interface.
- Have its own glare shield that you can add / remove as needed.
- Be easy to get the mini in and out.
- Allow easy access to the various swipe gestures on the iPad.
- Not block the front-facing camera.
The active cooling system can be simple – just a fan. The iPad has a metal case which does a good job of moving heat to the outside. A bit of forced convection keeps it happy under all but the most brutal of conditions.
The charger could be a module with USB-C PD capabilities, but the mini is pretty efficient, pretty small, and can usually get by with a traditional 5v 2.1 amp feed.
The Bluetooth interface is useful if you have an audio panel or even a basic intercom that has an analog “line level” or “CD player / iPod” input and no Bluetooth function. The iPad pairs with the mount and feeds all the prompts, alerts, notifications, and music the iPad generates over that link to the airplane without taking up the USB-C port.
You could argue that a portable mount should also have a battery that powers the cooler, charger, and module but that adds weight and complexity. It’s worth doing, but I wanted something that could be built fairly easily and did not require a custom PCB.
That same limitation also edged out another could-be goal: an integrated Ethernet adapter. Our FlightView system uses Ethernet as its primary means of communication, and that requires a USB-C to Ethernet adapter with USB-C Power Delivery (PD) pass-through. But that’s for an installed EFIS use case, not the EFB.
You could also ask for a bi-directional audio IO device – that would allow for some cool features like ATC transcription, but again it would require a custom board since you’re then doing charging, Ethernet, and audio all from the iPad’s one USB-C port.
Finally, you could also ask for a FlightBar mini – a version of our tactile controller that adds real knobs and real buttons to the iPad. Our current product is sized for the full-sized version in landscape, but there’s nothing that would prevent us from making a smaller version that fits the mini form-factor. But a new design would take several months and I wanted something I could fly with ASAP.
The Design
After a few false starts I eventually ended up adapting the basic structure of our existing FlightDock mount to the portrait orientation. I found a 60 mm CPU cooling fan that fit comfortably in the available space, and built a small “doghouse” on the back of the mount for the fan and the electronics. Here’s the design:
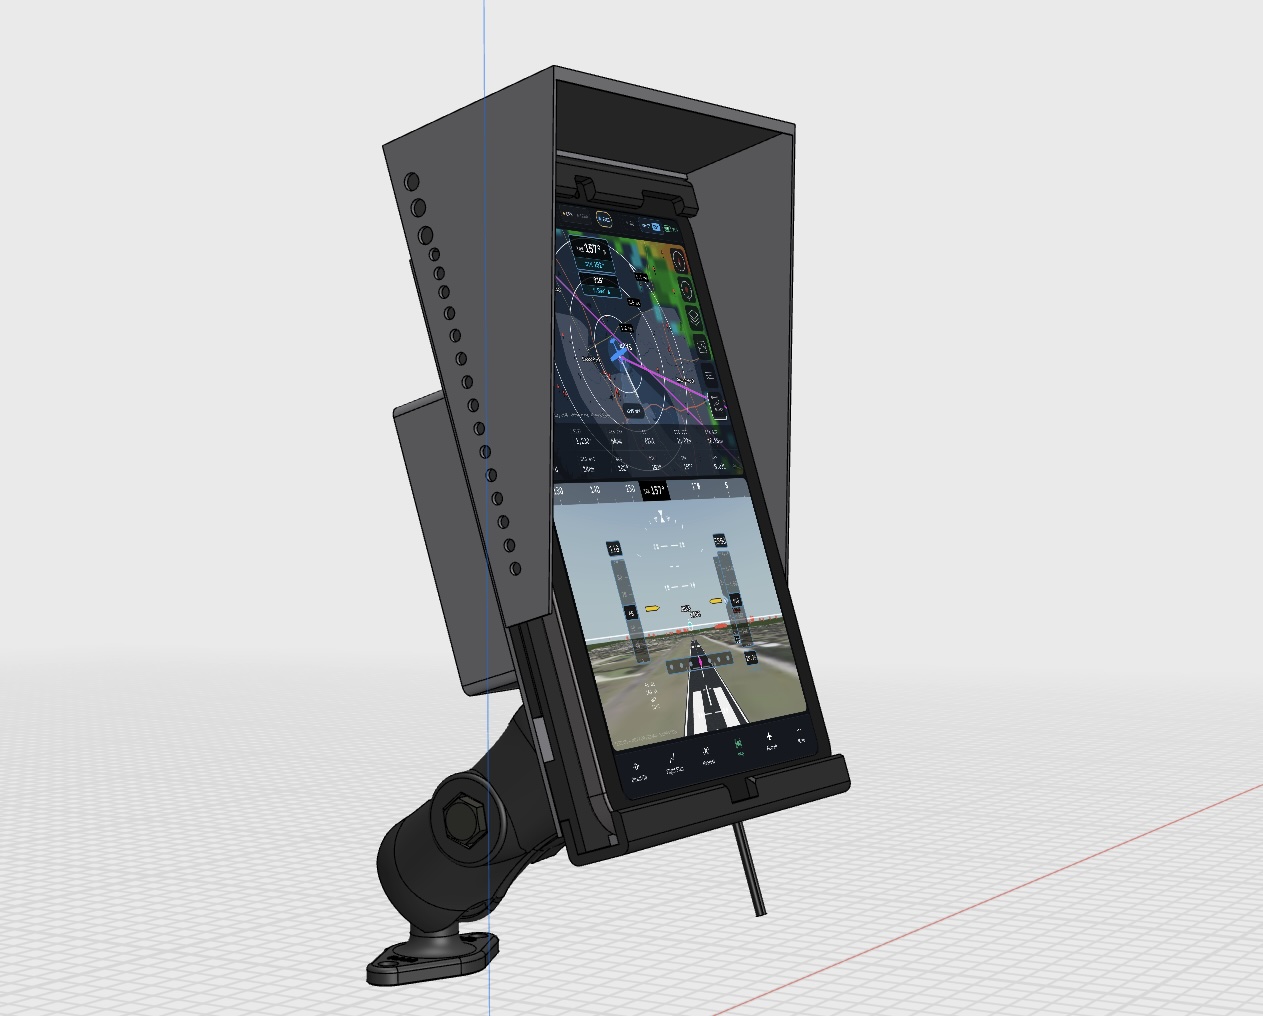
The box on the back of the mount contains the charger, the Bluetooth audio interface, the fan, and a barrel jack for the 12v connection. The charger, BT module, and fan are all 12v devices and wire directly to the barrel jack. The barrel jack lets you connect any 12v source you like. You can use a cable with a cigarette lighter plug for older aircraft. You can use a 12v battery pack for aircraft without an electrical system.
I went with a basic USB-C charger – 5 volts at up to 3 amps. No PD, which means no fast charging but it will keep the iPad running and slowly charge it up during active use. The charger came with a built-in pigtail and USB plug. If I opt to build a version with a custom PCB I’ll go with a USB jack which allows me to connect any style / length of cable, and to easily replace the cable if it gets damaged.
The fan has no speed controller and runs at its full speed all the time. It makes a good bit of noise, but who cares? You’re in an airplane with a headset on and an engine running. It’s slightly annoying on the ramp (and a little bit more so on my desk) but it keeps the mini nice and cool.
The mount itself is a combination of a metal plate and five 3D printed parts: the main plate, the upper slider with jaw, the lower jaw, the box, and the hood. I had the metal plate cut and powder coated by SendCutSend from T6061 aluminum. The printed parts took about 5 hours on my Prusa XL at its finest setting. If I was printing this on an HP Multi-Jet Fusion printer I could do it in four parts as the lower jaw and the main plate could be printed as a single item.
The mount is held together by a set of long #6 screws that pass through the box and fan, and by a set of #8 or #10 screws that attach the RAM ball on one end and fill the alternate RAM mount point at the other.
The hood is printed with a channel on the bottom of the inside while the slider is printed with a channel on top. The channel is sized to fit magnetic tape. The tape adheres to the plastic in the channels and the magnets are polarized so that the hood snaps into place. You could do the same thing using small neodymium magnets glued in – either approach works.
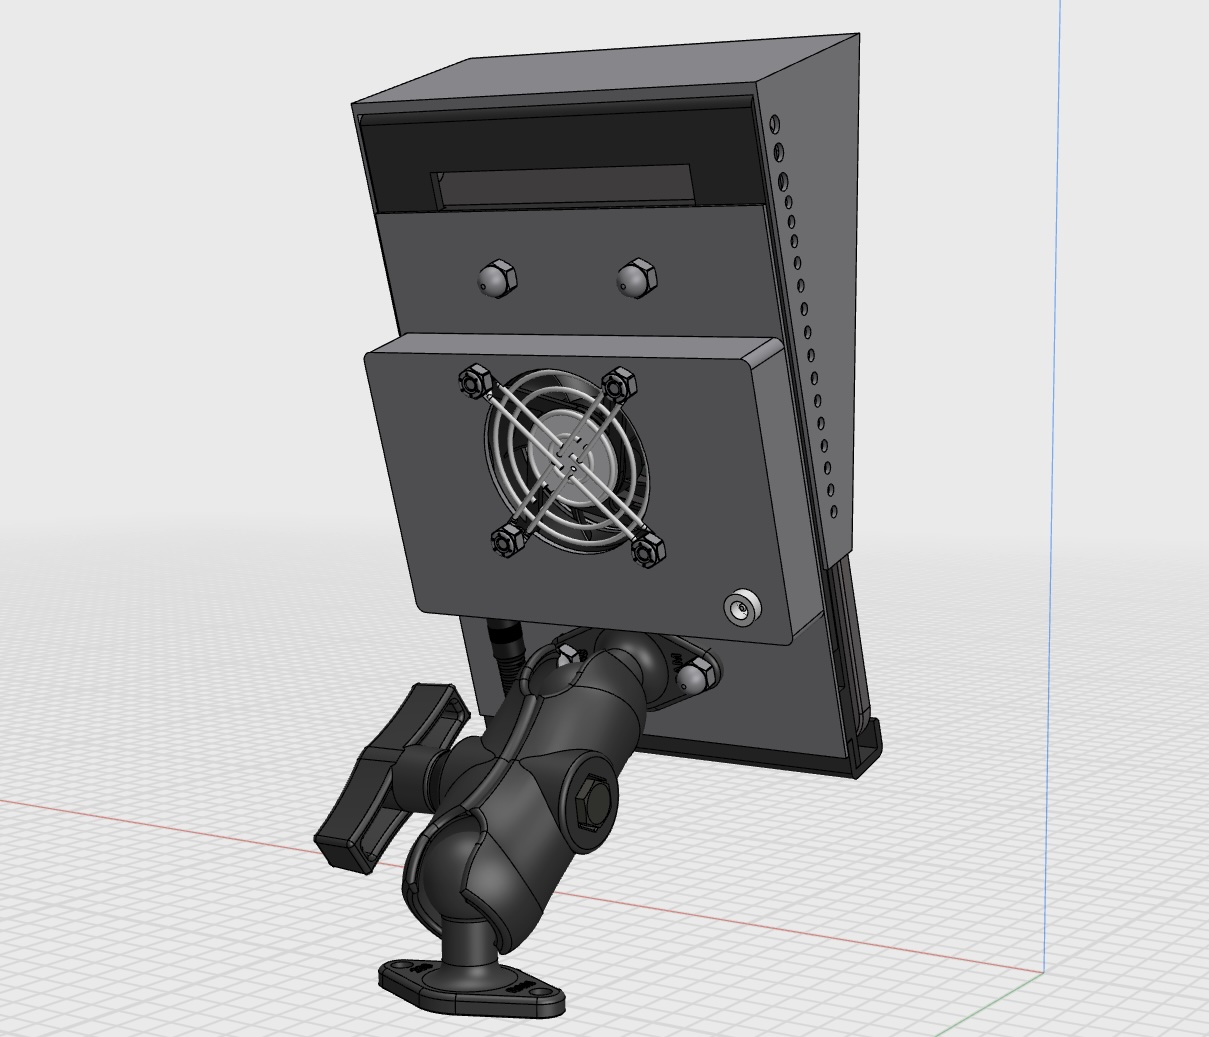
You’ll note some cut-outs in the slider where the jaw covers the upper portion of iPad screen. The center cut lets the front-facing camera work on the off chance you want to shoot selfies while you fly. The other two allow you to get your finger in position to slide down, which lets you access various features including the iOS Control Center. The next version I print will have the same kind of cutout on the bottom jaw in the center to make it easier to perform the slide-up gesture used to access the task manager.
I opted for the RAM diamond mount because it is small and does not crowd the doghouse the way the larger round ball mount would. The plates (both the metal plate and the 3D printed plastic plate) have holes at the bottom and at the top, which allows for two different mounting configurations. Most people will probably use the lower mount as you see here, but there are cases where the upper mount is useful. The unused mount point has screws, washers, and nuts that help hold the mount together.
For the demo setup pictured below I’m using a RAM arm and another ball mount. The same setup works with the RAM suction cup mount and yoke clamp mount.
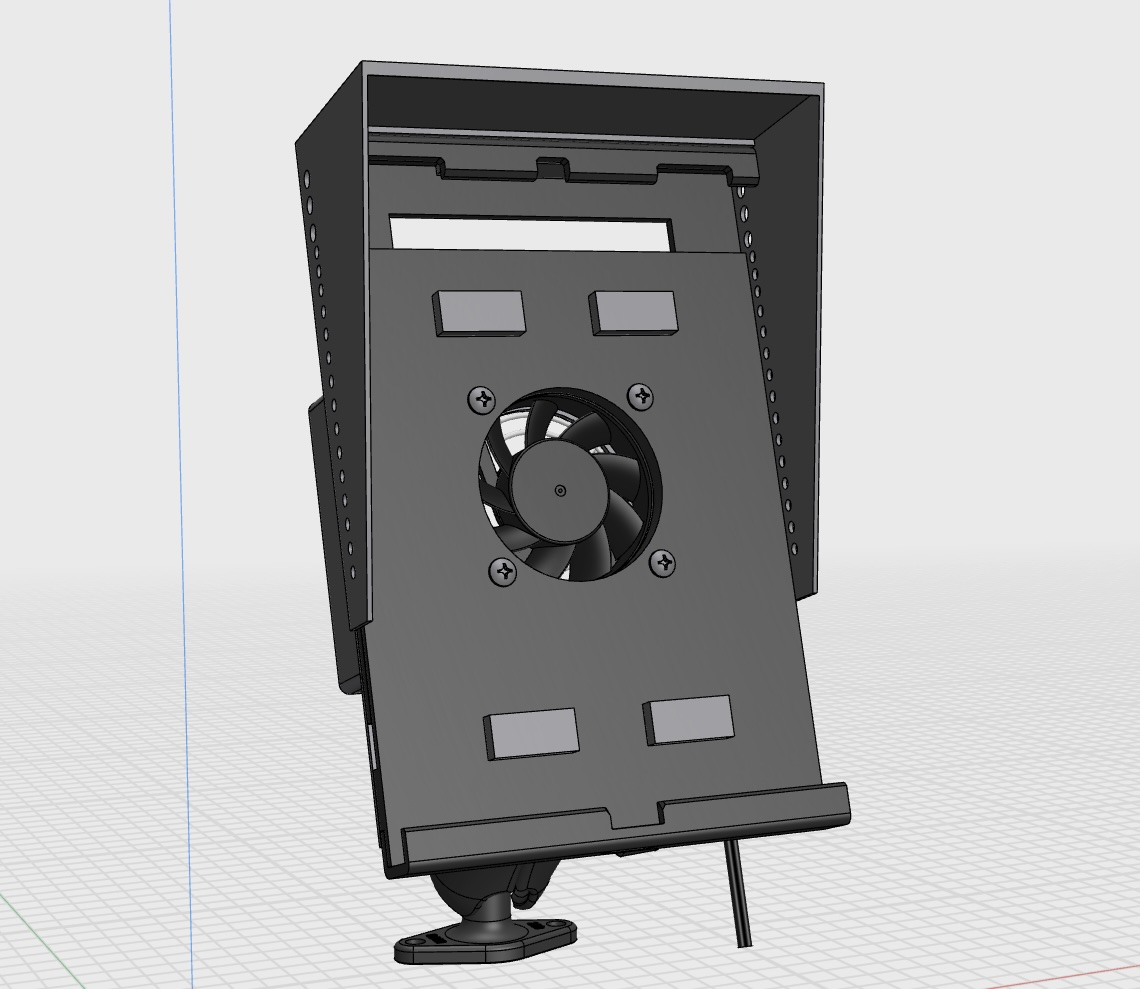
The iPad is held in place by friction with the foam rubber pads that cover the screws – depicted in light gray on the rendering above. The pads push the iPad forward into the jaws on the bottom plate and the slider. This tensions the slider arms in their channels, which keeps the slider from moving up/down too easily. The foam rubber prevents the iPad from moving laterally, as does the USB connection in the bottom. The jaw on the lower plate has a hole sized for the standard USB power plug’s outer fairing.
The Real Thing
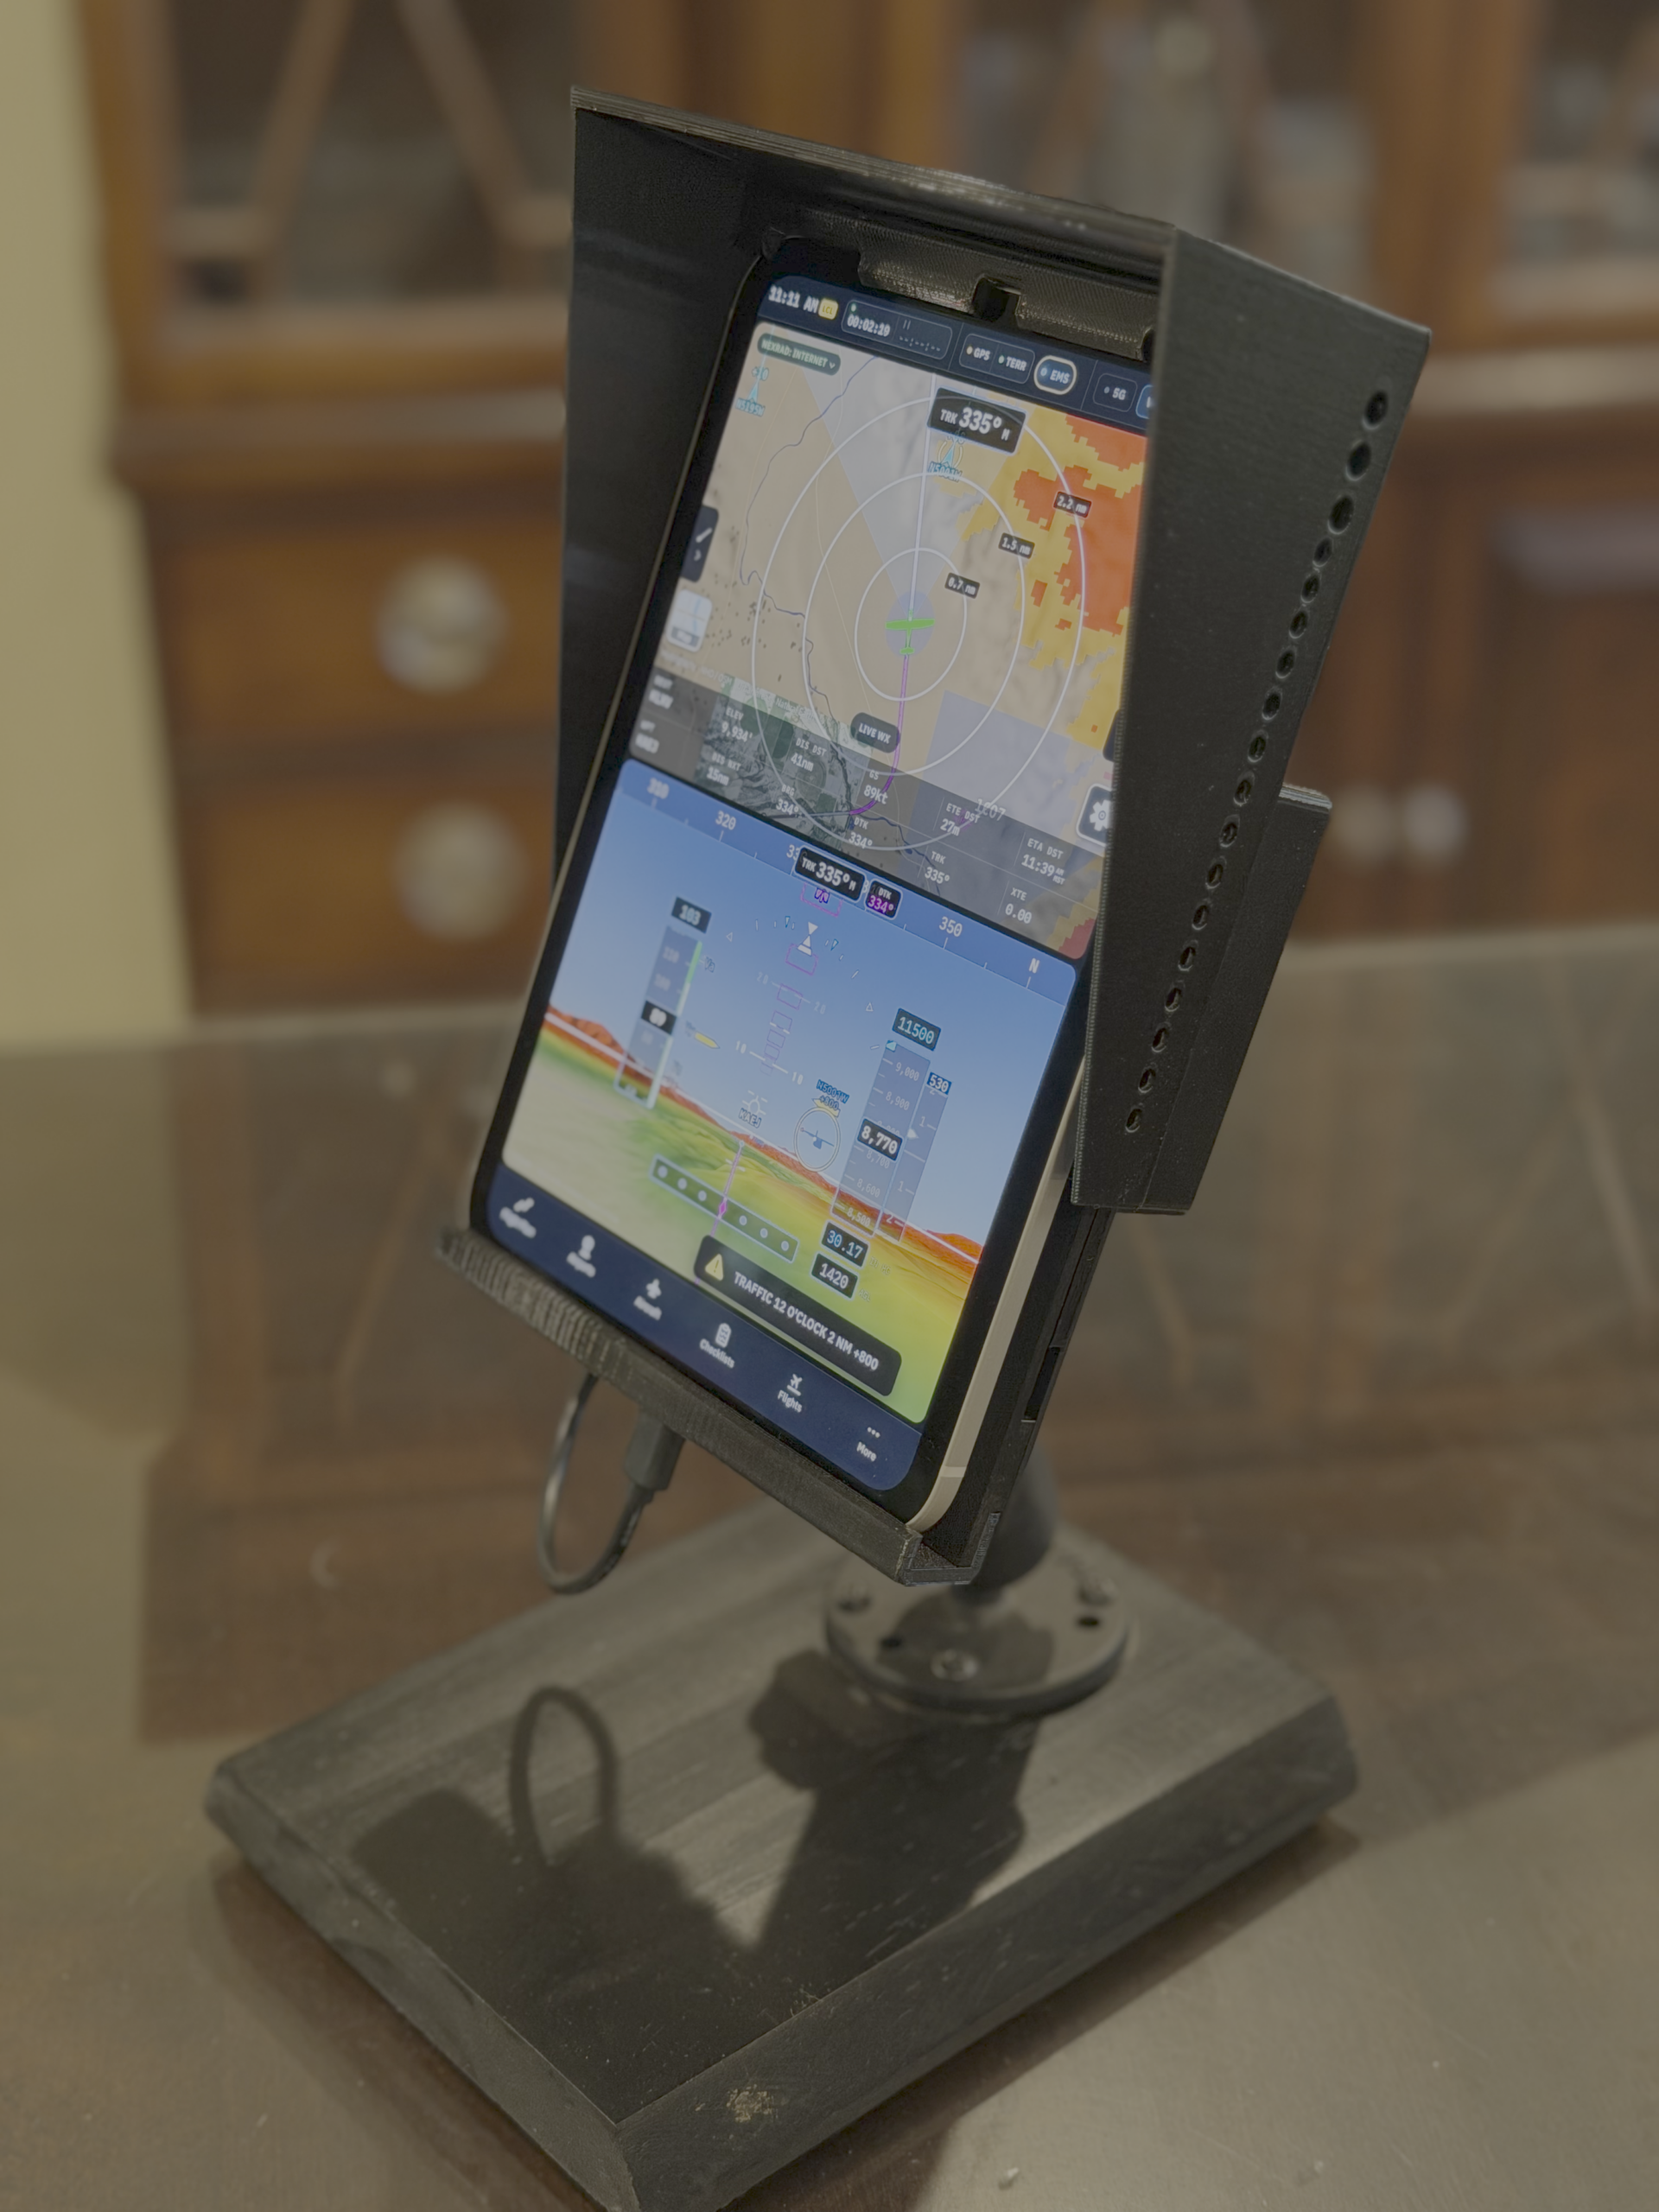
Not too shabby for a prototype.
I’ve flown with it twice now and it works as desogmed. The iPad stayed fully charged and never got hot. The audio link through the Bluetooth radio worked, and the iPad volume control was able to adjust it as expected. I mounted it using a RAM suction cup mount (I seem to be rich in those these days) and it held with no problem. Getting at the arm to adjust it was a bit awkward, but I think that’s the case for everything that uses an arm-mount in a small cockpit.
But Is There A Market?
I built this because I think it’s cool, useful, and solves several real problems that I was facing. I’m not sure how many people out there in the GA world have the same problems so I’m not committing to building it as a product. If you think it’s a good idea – good enough to turn into a product that you would pay for – let me know: Here’s a link to a survey.