One of the things that really distinguishes FlightView from other iPad-based EFIS* is our FlightBar – a wireless controller that adds a set of “hard” knobs and buttons to the system. Touch screens are great – on the ground. In the air, it’s generally best to have something a bit more tactile. FlightBar allows the user to control the FlightView app by pressing real buttons and turning real knobs. The only down side is that it attaches to our FlightDock iPad mount. Users who want the flush look of something like the Guardian mount are out of luck – there’s no good way to attach the FlightBar.
 Enter FlightStick
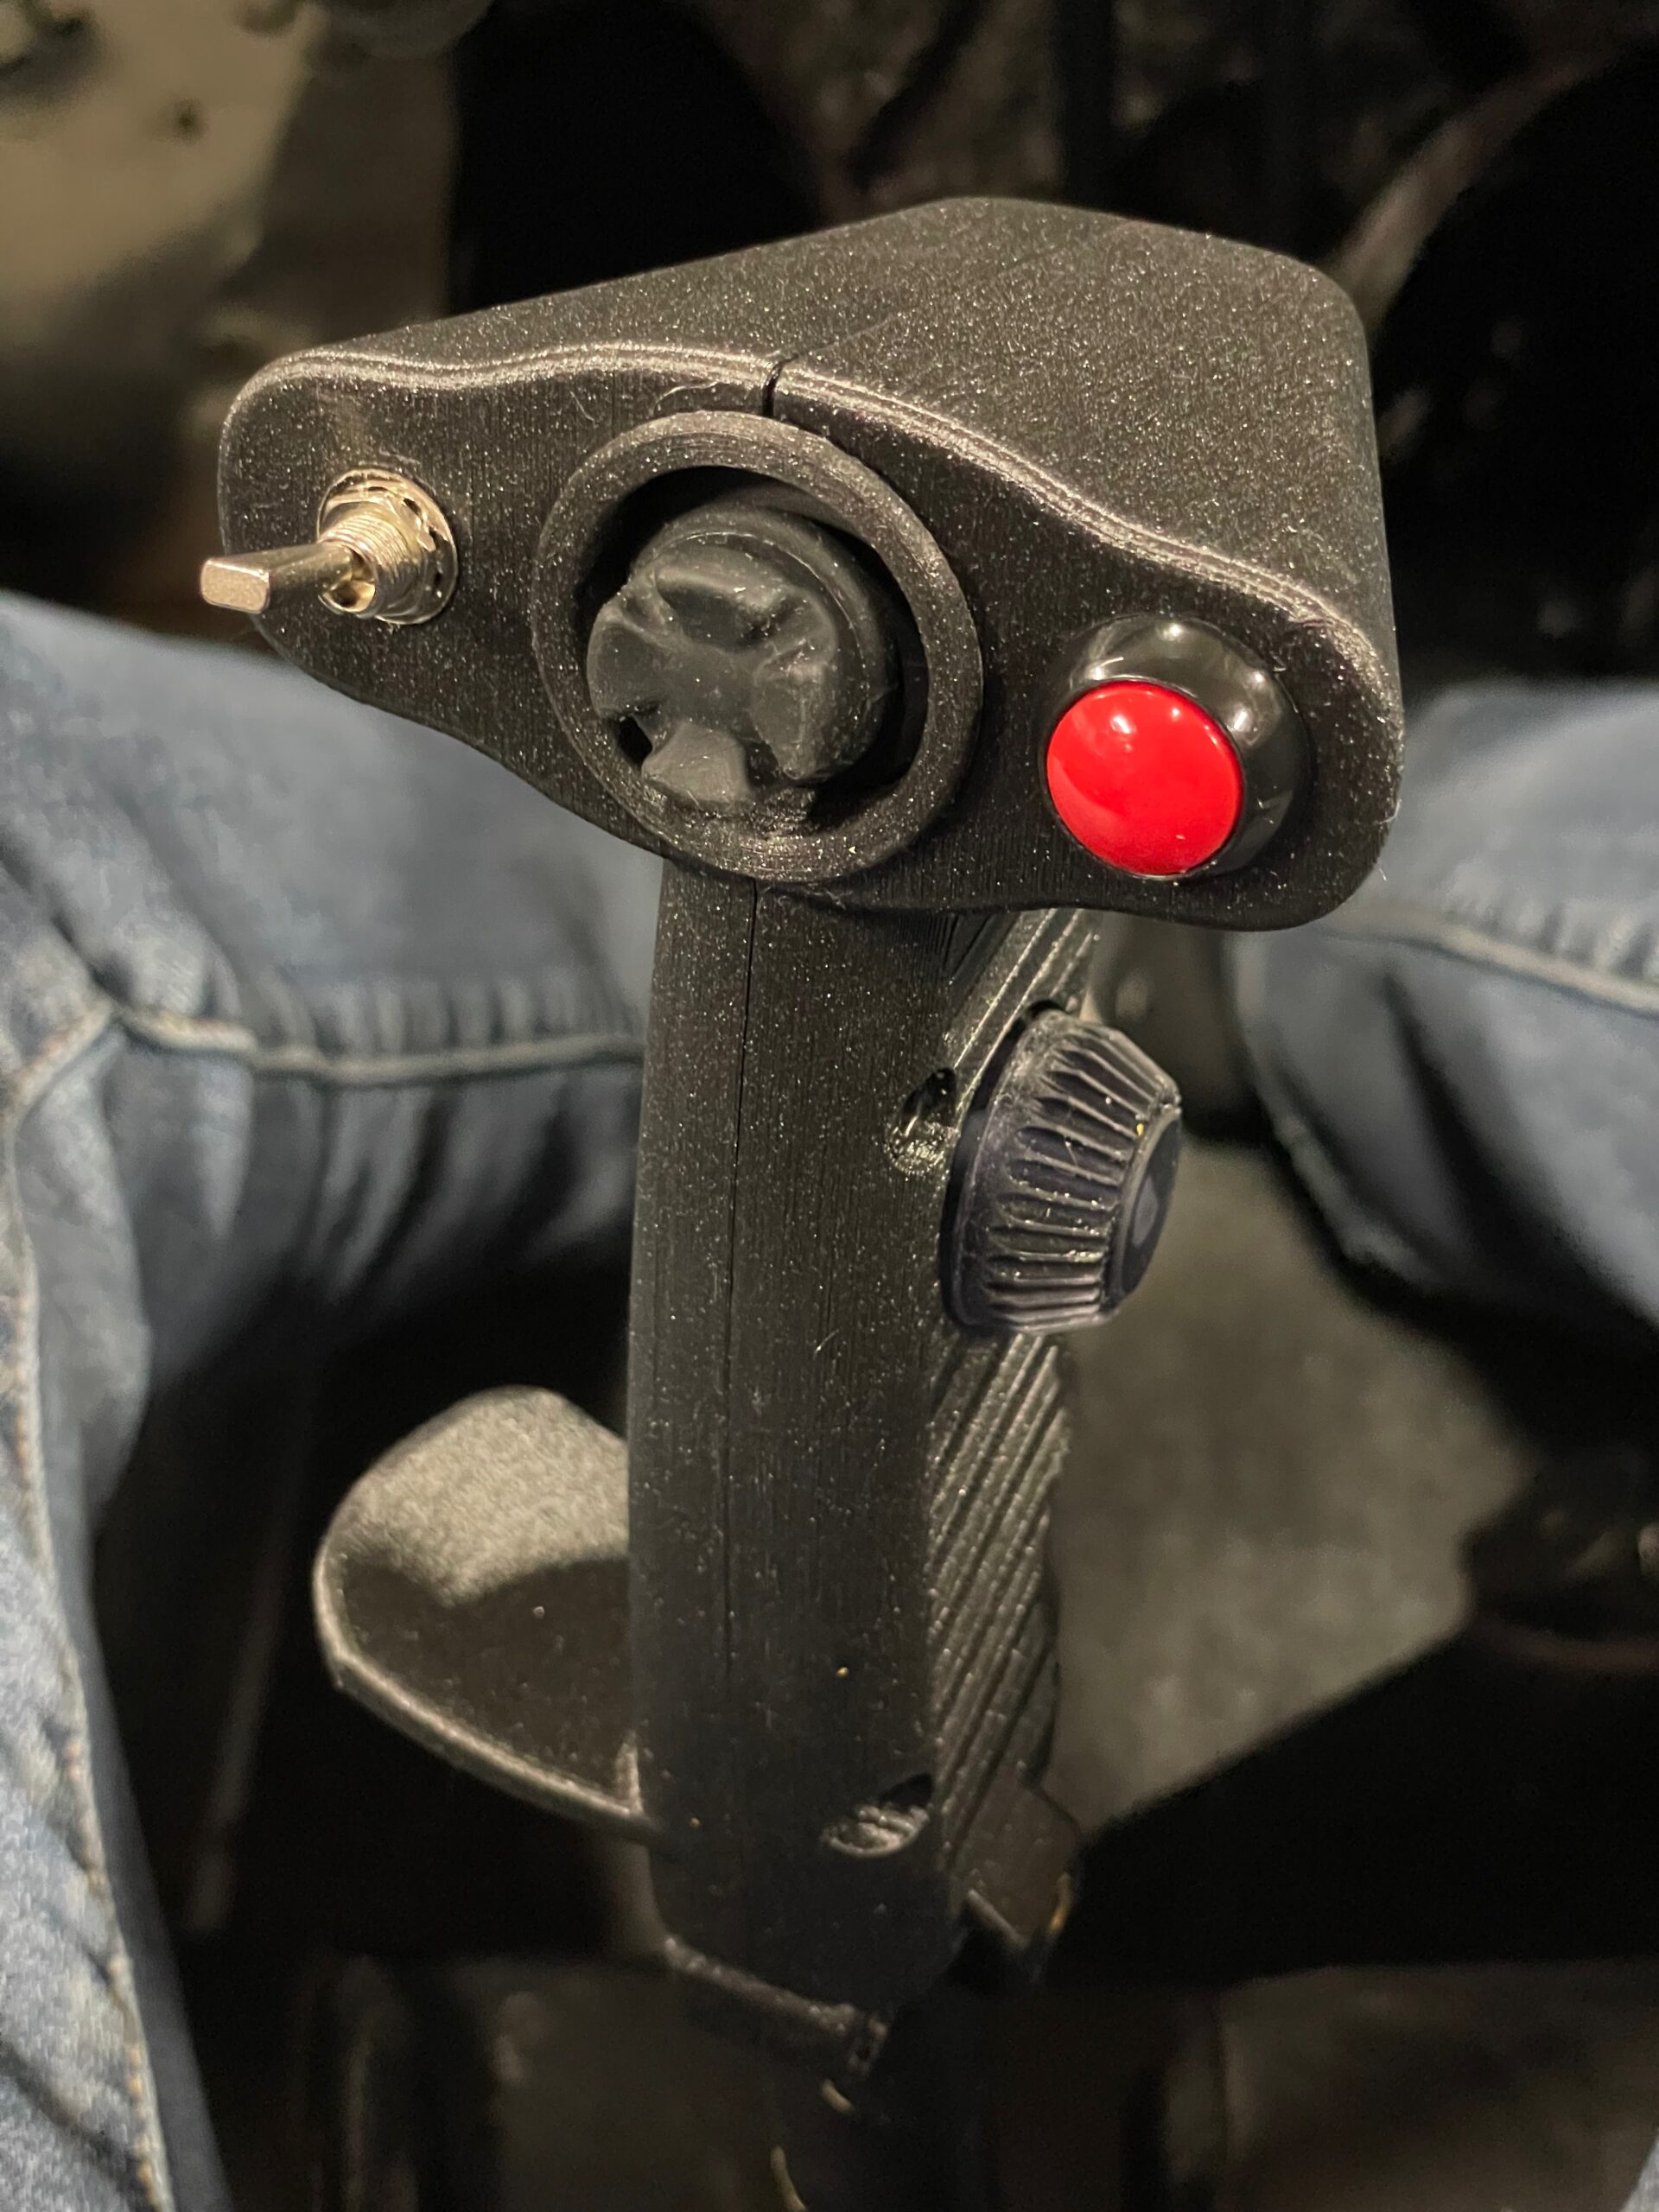
So, that’s where FlightStick comes in. As you may recall from a previous post, I’ve recently been working on a number of 3D printed designs, including our new USB motion isolator. Over the holiday break I spent some time prototyping a new product, a control stick grip with a single encoder knob that does most of what you can do with FlightBar but in a much smaller package.
The current prototype (pictured here) includes a three position flap switch, four button hat switch for trim, an autopilot disconnect button, a push-to-talk switch, and the encoder/button. The switches all do exactly what you expect. The real innovation is the encoder system. Inside the 3D printed housing is a tiny computer with a wireless interface. Like the FlightBar, it connects directly to an iPad, allowing the user to control the application through a series of clicks, double-clicks, long-press clicks, and ticks of the knob.
Click, Spin, Buzz
I’ve modified a version of the FlightView app to respond to the click sequences. Double-click to “wake up” the connection and to toggle between screen regions (Left / Right / Button Bar). Single click to toggle between screen elements (bugs on the PFD, MHz and KHz on the radio screen, etc.) Rotate the encoder (knob) to adjust a value, zoom in or out, or otherwise adjust the system. A buzz from a small haptic feedback motor confirms each click input and is also used as a tactile notification in the event of a system alert. You can access secondary screens and sub-menus by scrolling through the buttons on the Button Bar and clicking. The interface is fairly intuitive – my testers (some pilots, some not) quickly became adept at navigating the system.
Here’s a quick video demo:
And here’s another video showing the full design in my 3D CAD system:
To answer a few expected questions:
- You can use both FlightStick and FlightBar on the same iPad.
- You can have multiple FlightSticks in one aircraft.
- The only wired connection (for the encoder / button interface) is ship’s power (8v – 36v).
- You can use the other switches for whatever purpose you like – they all switch to ground when closed.
So far I only have a left-seat / left-hand version, but it should be trivial to mirror it for a right hand or center-stick cockpit. The next challenge is hand size. A brief and unscientific test seems to indicate that I’ll need “regular” and “extra large” versions. Before I go all-in and design a production circuit board, I would love some input from other pilots. If you have any thoughts or suggestions, or to let me know you’re interested in FlightStick, please contact me, either by email or using our contact form.
* Yes, EFIS is the plural of EFIS. Did you think it would be EFISz?